 English
 Magyar
 Deutsch



It runs applications in Docker containers: the program arrives in an image file, together with the directories required for it to run, so it starts up in exactly the same way on any Linux server. An n8n, a Nextcloud or a custom web application can thus be launched on a Linux-based KVM VPS with just a few commands, and runs in isolation from the rest of the system.
This article explains how to install the Docker Engine from Docker’s own repository, together with the Buildx and Compose extensions. This is followed by the first steps: a test container, running without root privileges, limiting log sizes, the first real container, and an important security issue: the ports opened by Docker are not blocked by the firewall. Our blog post Using Docker on a VPS explains what Docker is good for on a VPS and when it is worth choosing.
We tested these steps in November 2026 on Ubuntu 26.04 and 24.04, Debian 13 and AlmaLinux 10.2, using Docker version 29.9.3, Compose version 5.7.0 and Buildx version 0.38.1. Run the commands as a user with sudo privileges (see: Creating a user and granting sudo privileges).
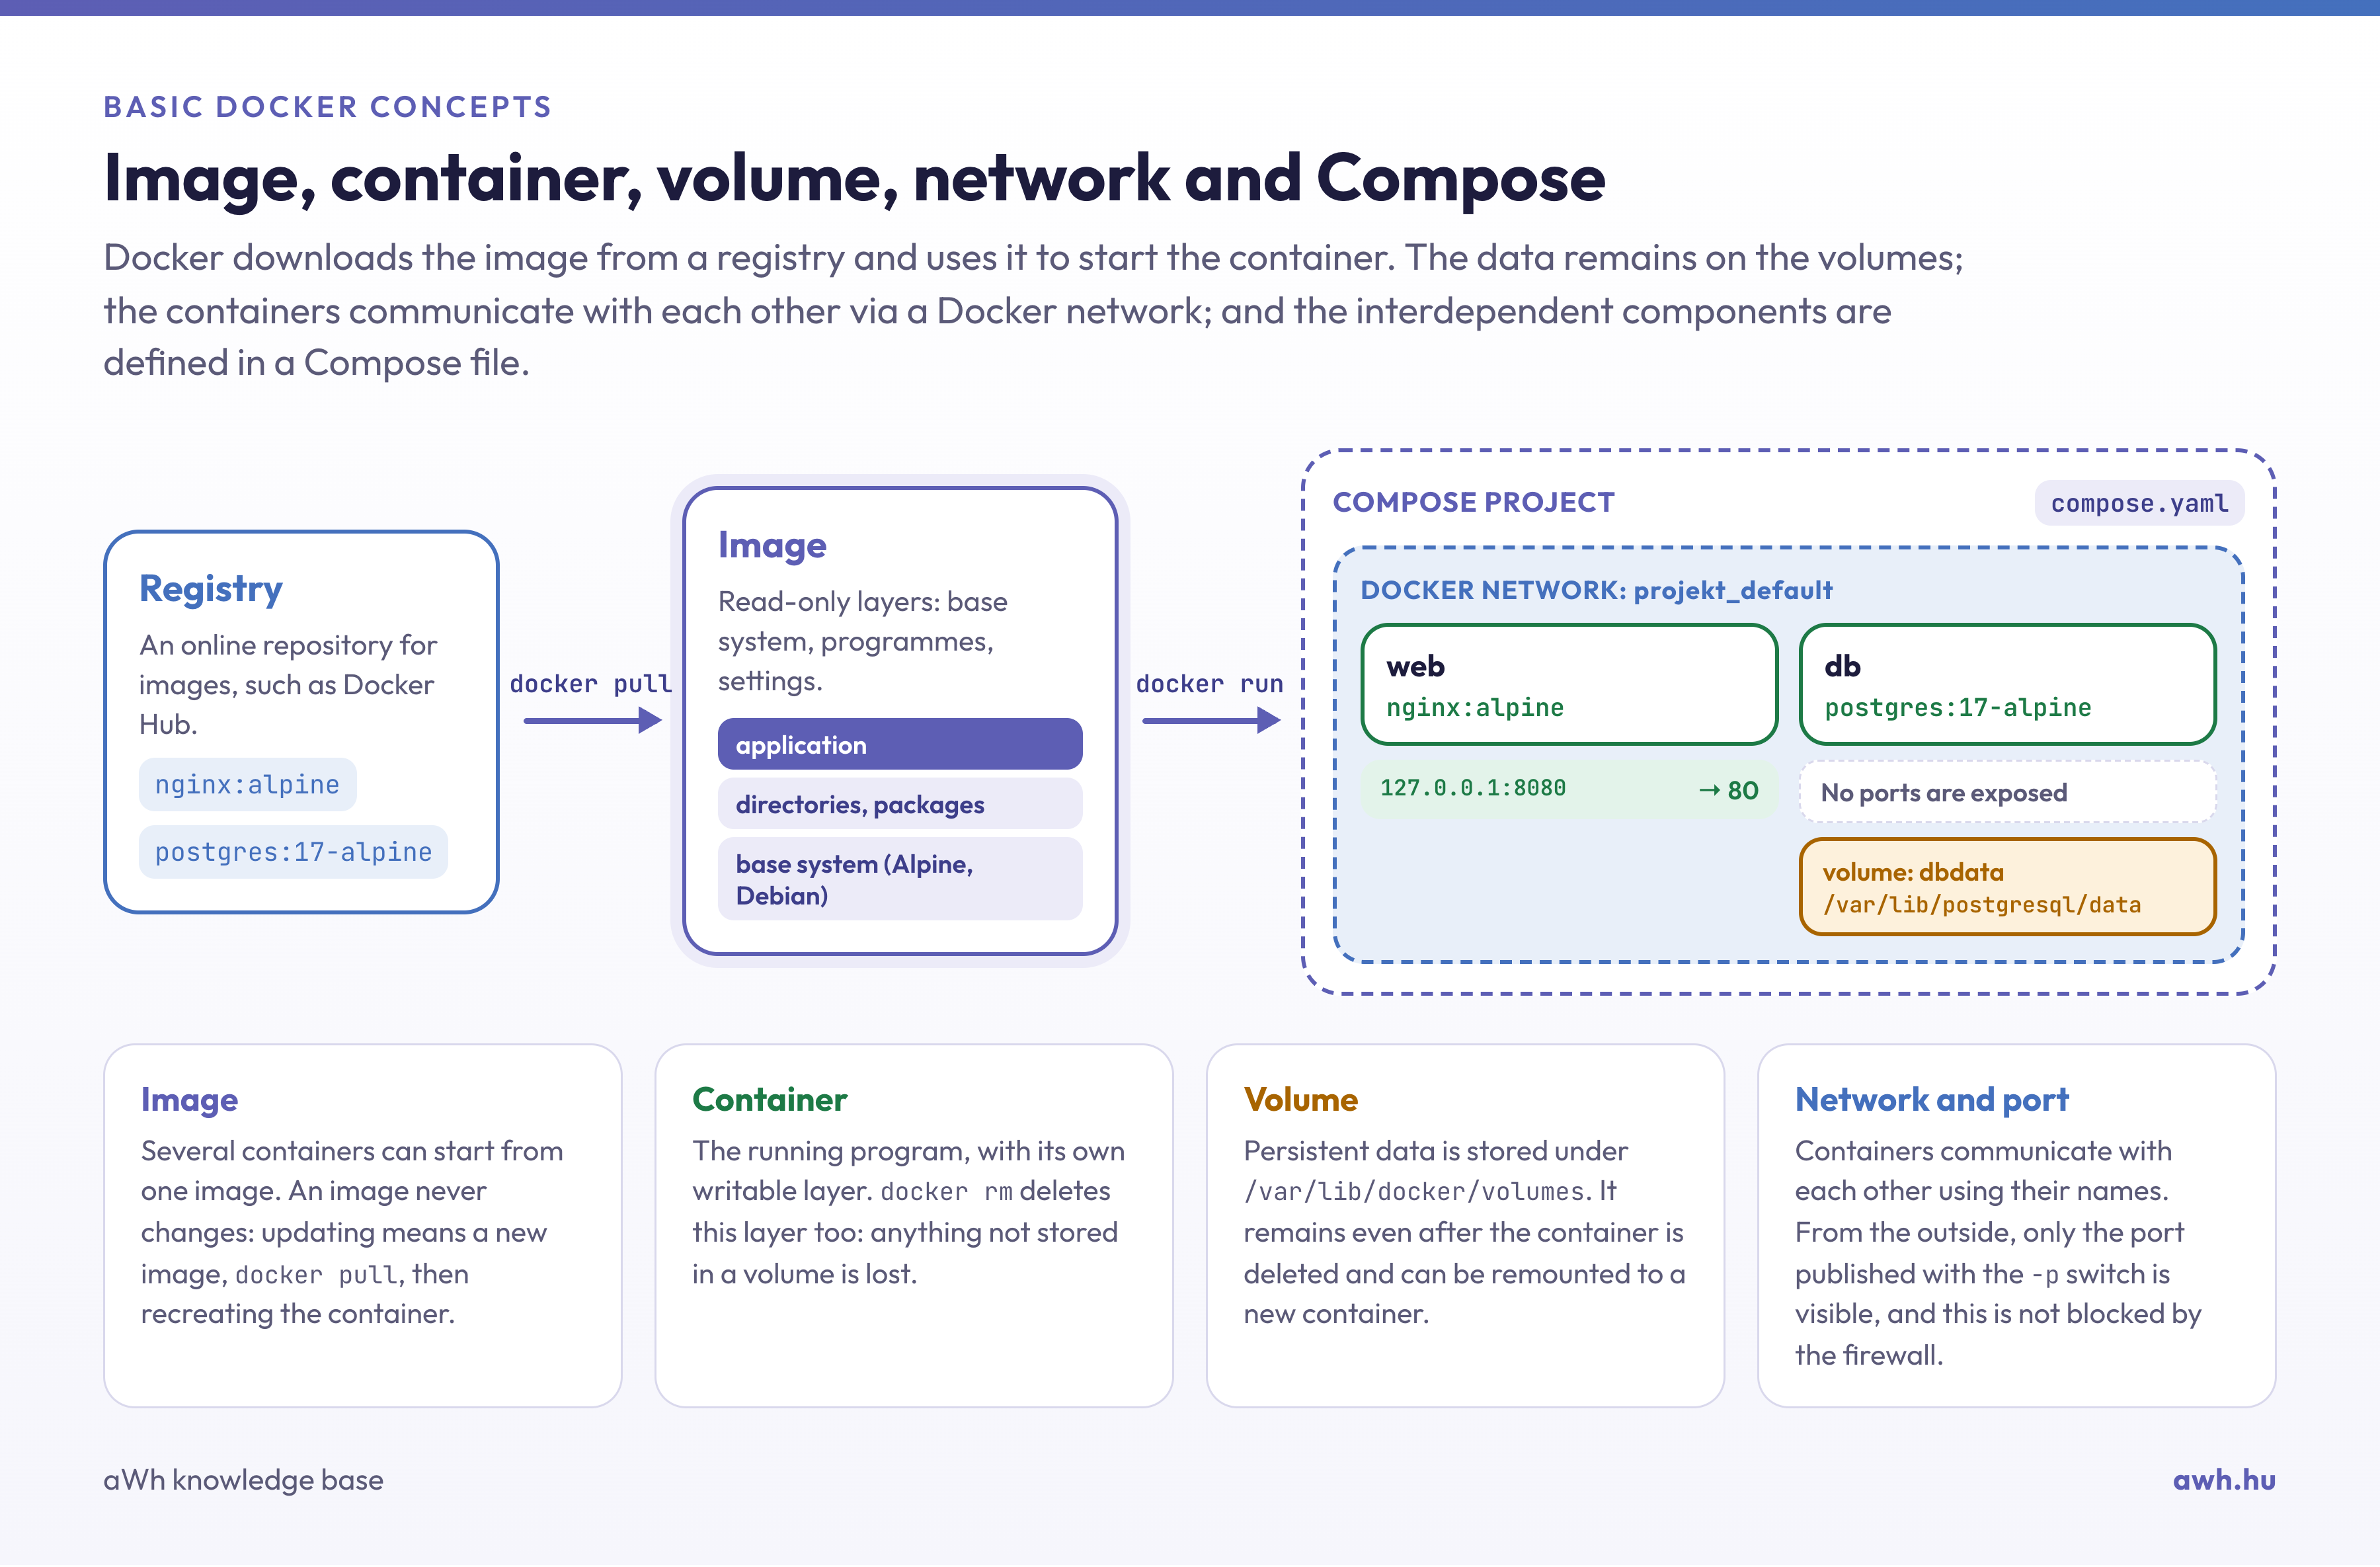
Why use Docker’s own repository?
The distributions’ own packages are older and do not always contain the same components:
| System | In the system’s repository (November 2026) | In the Docker repository |
|---|---|---|
| Ubuntu 26.04 | docker.io 29.1.3, docker-compose-v2 2.40.3 |
Docker 29.9.3, Compose 5.7.0 |
| Debian 13 | docker.io 26.1.5, docker-compose 2.26.1 |
Docker 29.9.3, Compose 5.7.0 |
| AlmaLinux 10 | No Docker, just podman-docker |
Docker 29.9.3, Compose 5.7.0 |
- Ubuntu and Debian: the
docker.iopackage is maintained by the distribution and is only updated according to its own release cycle. Debian 13 is two major versions behind. The Docker documentation and the installation guides for most applications are based on Docker’s own packages (docker-ce). - AlmaLinux (and RHEL, Rocky Linux): Red Hat supplies Podman instead of Docker. The
podman-dockerpackage in the AppStream repository provides a command calleddocker, which actually invokes Podman. Most commands still work, but Podman is not the Docker daemon, and Docker Compose does not run in quite the same way with it. If a guide specifies Docker, install Docker’s own packages. During testing,podman-dockeranddocker-ceconflicted with each other; dnf would not allow them to be installed simultaneously.
Docker’s own packages conflict with the distribution’s packages. If an older, distribution-provided version of Docker is already installed on the server, remove it before installation (containers, images and volumes in the /var/lib/docker directory will remain):
# Ubuntu
sudo apt remove $(dpkg --get-selections docker.io docker-compose docker-compose-v2 docker-doc docker-buildx podman-docker containerd runc | cut -f1)
# Debian
sudo apt remove $(dpkg --get-selections docker.io docker-compose docker-doc docker-buildx podman-docker containerd runc | cut -f1)
# AlmaLinux
sudo dnf remove docker docker-client docker-client-latest docker-common docker-latest docker-latest-logrotate docker-logrotate docker-engine podman runc
If none of the packages are installed, dpkg will display the message ‘no packages found matching’ and dnf will display ‘No match for argument’, and nothing will be removed. This is not an error.
Installation on Ubuntu
As of November 2026, the Docker repository supported the 64-bit versions of Ubuntu 22.04, 24.04, 26.04 and 26.10. Please add the repository’s signing key and repository description as per the Docker documentation:
sudo apt update
sudo apt install ca-certificates curl
sudo install -m 0755 -d /etc/apt/keyrings
sudo curl -fsSL https://download.docker.com/linux/ubuntu/gpg -o /etc/apt/keyrings/docker.asc
sudo chmod a+r /etc/apt/keyrings/docker.asc

sudo tee /etc/apt/sources.list.d/docker.sources <<EOF
Types: deb
URIs: https://download.docker.com/linux/ubuntu
Suites: $(. /etc/os-release && echo "${UBUNTU_CODENAME:-$VERSION_CODENAME}")
Components: stable
Architectures: $(dpkg --print-architecture)
Signed-By: /etc/apt/keyrings/docker.asc
EOF

sudo apt update
In the Suites line, enter the system’s codename (resolute on Ubuntu 26.04, noble on 24.04), so that the same command works on all supported releases. Then install the packages:
sudo apt install docker-ce docker-ce-cli containerd.io docker-buildx-plugin docker-compose-plugin
On Ubuntu and Debian, the docker service starts immediately after installation and also starts at system boot; this is indicated by the commands systemctl is-active docker and systemctl is-enabled docker (active, enabled).
Installation on Debian
On Debian, the process is the same, except that the repository address and codename are different (Debian 13: trixie, Debian 12: bookworm; Docker supported both of these in November 2026):
sudo apt update
sudo apt install ca-certificates curl
sudo install -m 0755 -d /etc/apt/keyrings
sudo curl -fsSL https://download.docker.com/linux/debian/gpg -o /etc/apt/keyrings/docker.asc
sudo chmod a+r /etc/apt/keyrings/docker.asc

sudo tee /etc/apt/sources.list.d/docker.sources <<EOF
Types: deb
URIs: https://download.docker.com/linux/debian
Suites: $(. /etc/os-release && echo "$VERSION_CODENAME")
Components: stable
Architectures: $(dpkg --print-architecture)
Signed-By: /etc/apt/keyrings/docker.asc
EOF

sudo apt update
sudo apt install docker-ce docker-ce-cli containerd.io docker-buildx-plugin docker-compose-plugin
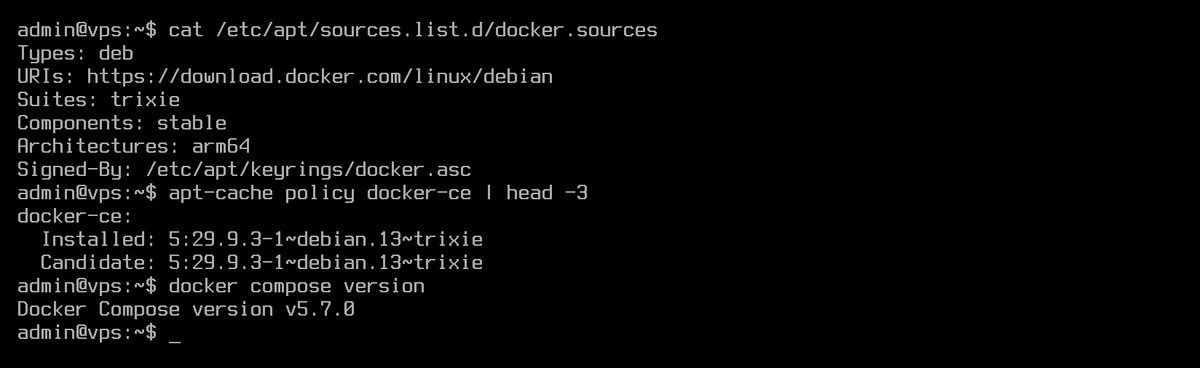
The article Checking the Linux version explains which Linux distribution is running on the server.
Installation on AlmaLinux
On AlmaLinux, you can use the Docker RHEL repository. The Docker documentation lists RHEL versions 8, 9 and 10; we tested it on AlmaLinux 10.2. Before installation, update the system and, if a new kernel is available, restart the machine (you can read the reason for this below, in the troubleshooting section):
sudo dnf upgrade
sudo reboot
Next, add the repository and install the packages:
sudo dnf install dnf-plugins-core
sudo dnf config-manager --add-repo https://download.docker.com/linux/rhel/docker-ce.repo
sudo dnf install docker-ce docker-ce-cli containerd.io docker-buildx-plugin docker-compose-plugin
During the initial installation, dnf will prompt you for the repository’s GPG key. Accept it if the fingerprint is 060A 61C5 1B55 8A7F 742B 77AA C52F EB6B 621E 9F35.
On AlmaLinux, the service does not start automatically after installation; it must be enabled manually:
sudo systemctl enable --now docker
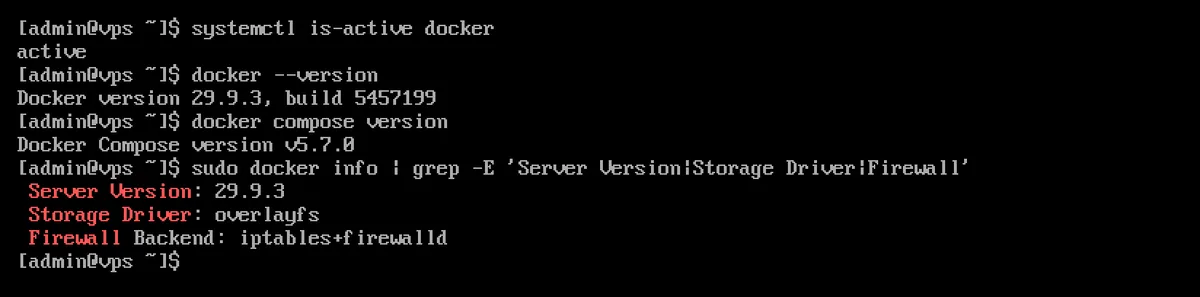
The line Firewall Backend: iptables+firewalld: iptables+firewalld’ in the output of the docker info command indicates that Docker has detected that firewalld is running (this will be discussed in the section on firewalls). The article systemctl: starting, stopping and restarting services explains how to manage services.
Troubleshooting: “Extension addrtype revision 0 not supported”
During testing, the freshly installed Docker on AlmaLinux 10 did not start initially (Job for docker.service failed). The journalctl -u docker log contained the following:
failed to add jump rules to ipv4 NAT table: ... Warning: Extension addrtype revision 0 not supported, missing kernel module?
The xt_addrtype kernel module is required for Docker’s firewall rules; in AlmaLinux 10, this is included in the kernel-modules-extra package. When Docker is installed, dnf installs this as a dependency (via the iptables-nft package), but always for the latest kernel. If an older kernel is still running on the machine, the module will not be loaded for it. Solution: update the system and restart the machine; in our test, Docker started without any issues after the restart. If the package is missing, install it manually:
sudo dnf install kernel-modules-extra
sudo reboot
The installation script (get.docker.com)
Docker also provides an installation script that detects the system, mounts the repository and installs everything:
curl -fsSL https://get.docker.com -o get-docker.sh
sh get-docker.sh --dry-run
sudo sh get-docker.sh
With the --dry-run switch, the script simply lists what it would run. In the test on Debian 13, it installed the same packages as the manual method, including the docker-model-plugin, and also started the service. On AlmaLinux, it would pull the https://download.docker.com/linux/alma/docker-ce.repo repository.
According to the Docker documentation, this script is intended for testing and development machines; it is not recommended for production servers: it does not allow you to select a specific version and always installs the latest packages (which may even be a new major version). Please set up a production server using the manual steps above, and do not run a script downloaded from the internet as root without first checking it. You can also inspect the downloaded get-docker.sh file before running it.
Test: hello-world
sudo docker run --rm hello-world
Docker downloads the hello-world image from Docker Hub, starts it, and the container prints the message ‘Hello from Docker!’. The --rm switch then deletes the container once it has finished running.
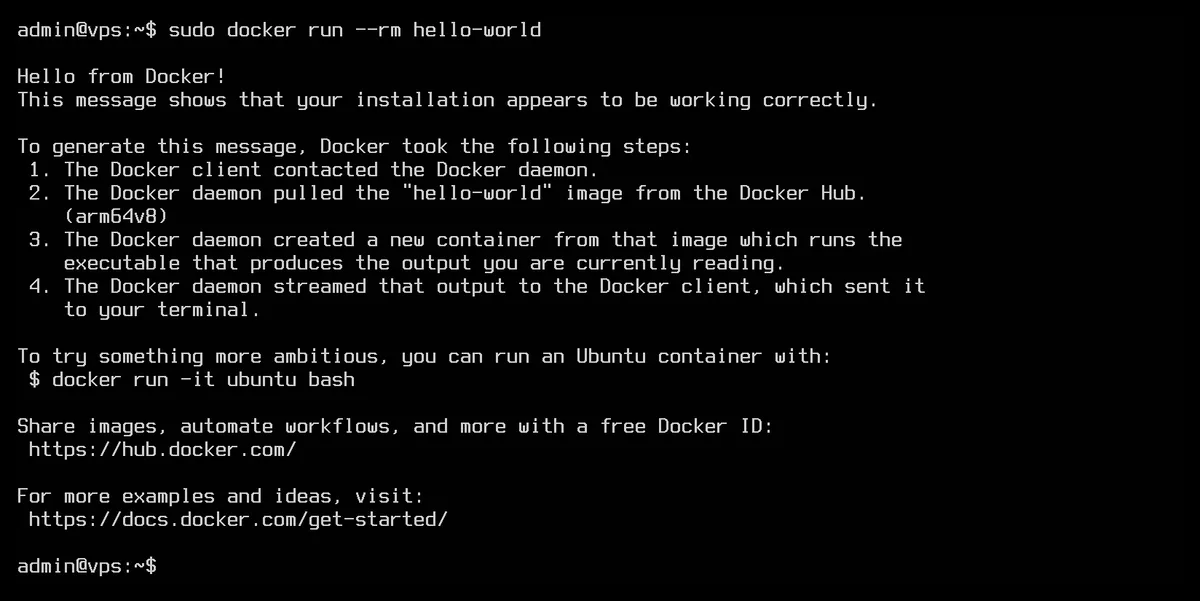
You can check the version of the Compose and Buildx plugins as follows:
docker compose version
docker buildx version
The compose command is now docker compose (written with a space). The old docker-compose program, written with a hyphen, is not installed with Docker packages.
Docker without root: the docker group
By default, only the root user (and sudo) can access the Docker daemon. For other users, the command will fail as follows:
permission denied while trying to connect to the docker API at unix:///var/run/docker.sock
If you do not want to have to type sudo before every command, add the user to the docker group, then log out and back in (or open a new SSH connection) for the group membership to take effect:
sudo usermod -aG docker $USER
After logging in again, the docker ps command now works without sudo. For more information on groups, see the article Listing users and groups on Linux.
Please note: members of the docker group are effectively granted root privileges. Any directory can be mounted into a container, including the machine’s entire file system. In our test, running the command docker run --rm -v /:/host alpine cat /host/etc/shadow without a password or sudo printed the file containing the password hashes. Therefore, only add users to the group to whom you would grant root privileges, and never make a web application or an SFTP user a member of this group.
Docker’s rootless mode is more secure (the daemon also runs on behalf of the user), but according to the documentation, it has certain limitations; for example, by default, it cannot listen on ports below 1024. We do not cover this mode in this article.
Limits on log file sizes
By default, Docker uses the json-file log driver with no size limit: whatever a container writes to its output is all saved to a single file in the /var/lib/docker/containers/ directory. A container that logs extensively can therefore fill up the disk within days. In our test, the log of a container writing continuously grew to 1 GB in 10 seconds.
Set the limit in the /etc/docker/daemon.json file (this file does not exist by default, so you will need to create it):
sudo mkdir -p /etc/docker
sudo nano /etc/docker/daemon.json
{
  "log-driver": "json-file",
  "log-opts": {
    "max-size": "10m",
    "max-file": "3"
  }
}
This means that a maximum of 3 log files remain per container, each up to 10 MB in size. After saving, restart Docker:
sudo systemctl restart docker
In the test, after configuration, there were indeed three files remaining in the container’s log directory (…-json.log, .1, .2), each around 10 MB in size. Important: this configuration only applies to newly created containers. Existing containers must be deleted and recreated (using Compose: docker compose up -d --force-recreate). Docker will not start if the JSON file contains a syntax error (in the test, this occurred after an extra comma: unable to configure the Docker daemon with file /etc/docker/daemon.json: invalid JSON), so always check the output of systemctl status docker after a restart. The article Deleting Docker images, containers and volumes explains how to clear out logs that have already grown in size.
The first real container
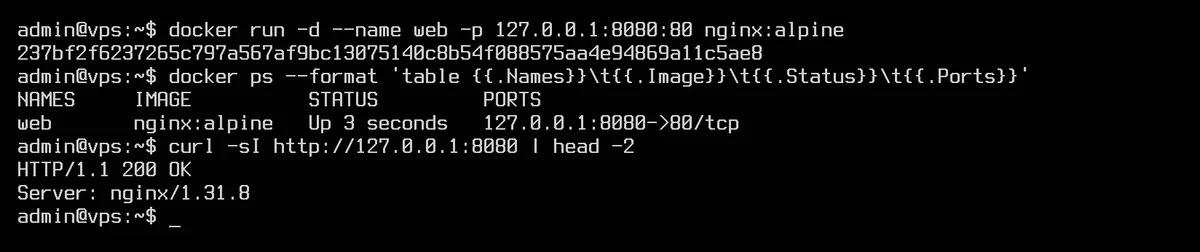
Start an Nginx web server, which can be accessed on port 8080 of the machine:
docker run -d --name web -p 127.0.0.1:8080:80 nginx:alpine
docker ps
curl -sI http://127.0.0.1:8080 | head -2
-d: the container runs in the background.--name web: the name of the container; you can use this to refer to it (docker logs web,docker stop web).-p 127.0.0.1:8080:80: forwards port 8080 on the host to port 80 on the container, but only on the local address. This port is not accessible from outside. If you omit the prefix (-p 8080:80), the port will be open on all addresses, including from the internet, regardless of the firewall settings (see the next section).nginx:alpine: the image name and tag. Docker will download it if it is not already on the machine.
The default output of docker ps is quite extensive. The image shows a more concise version, limited to the key columns:
docker ps --format 'table {{.Names}}\t{{.Image}}\t{{.Status}}\t{{.Ports}}'
Stopping and deleting a container:
docker stop web
docker rm web
It is more convenient to describe several related containers (for example, an application and its database) in a single file: this is covered in the article on using Docker Compose. If you wish to manage containers via a web browser, the articles on Portainer, Dockge and Coolify will help you choose; Nginx Proxy Manager can serve multiple web applications on a single server using a shared SSL certificate.
Important: the firewall does not block the published ports
Docker opens ports published with the -pswitch using its own iptables rules: it routes the incoming packet to the container (DNAT) before the firewall rules are applied. Consequently, neither ufw nor firewalld filters this traffic. This is also described in the Docker documentation, and this is exactly what happened in the test:
- Ubuntu 26.04 and Debian 13, with ufw: ufw was enabled and only allowed SSH (
Default: deny (incoming)). A standard web server running without Docker was inaccessible from outside on port 8081, whereas the Nginx container started with the-p 8080:80) switch did respond from outside. - AlmaLinux 10.2 with firewalld: the same issue. Only the
ssh,cockpitanddhcpv6-clientservices were permitted in firewalld’spubliczone, yet the container’s port 8080 was still accessible. The firewalld rule chain allows address-translated (DNAT) packets to pass through before the zones and policies are applied (ct status dnat accept), so it was not possible to block the port even with a custom firewalld policy.
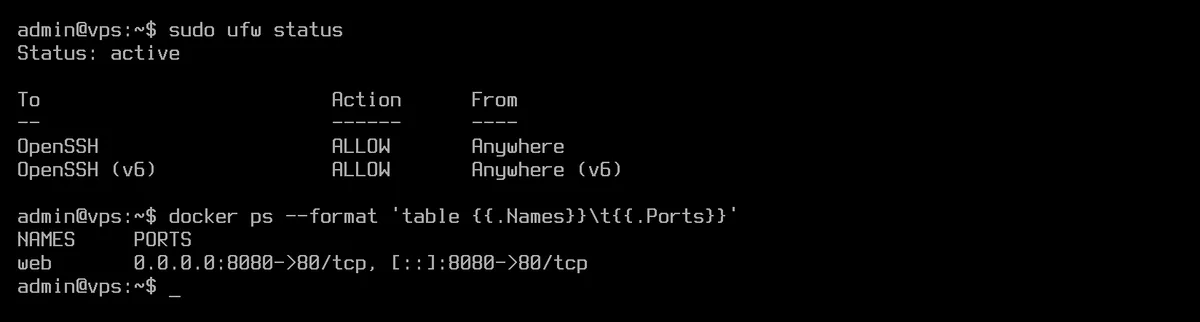
The command sudo ss -tlnp shows which address a port is listening on: 0.0.0.0:8080 and [::]:8080 represent all addresses, while 127.0.0.1:8080 refers only to the local address (see: Listing open ports: ss and lsof).
Solution 1: Forward the port to the local address
The simplest and most secure option: anything that does not need to be accessed directly from the internet should be mapped to the address 127.0.0.1.
docker run -d --name web -p 127.0.0.1:8080:80 nginx:alpine
The same in a Compose file:
    ports:
      - "127.0.0.1:8080:80"
In the test, the port was therefore not accessible from outside on any of the systems. The web applications are then made available via a reverse proxy (such as Nginx Proxy Manager or Nginx installed on the machine) on ports 80 and 443, using HTTPS; a database or an administration interface can be accessed via an SSH tunnel from your own machine (ssh -L 8080:127.0.0.1:8080 felhasznalo@szerver-ip).
In the daemon.json file, the "ip": "127.0.0.1" setting also binds the -p 8080:80 format to the local address, but in the test this only applies to the default network (when using the simple docker run command). Compose creates a separate network for each project, and there "8080:80" continues to provide an open port on every address. You should therefore not rely on this setting; specify the 127.0.0.1: prefix.
Solution 2: a rule in the DOCKER-USER chain
If a container’s port needs to be accessible from the outside, but only from specific addresses, the rule must be written into the DOCKER-USER iptables chain reserved by Docker for this purpose; Docker will not overwrite this. The rule below drops new connections arriving on the external network interface (enp0s1 in this case; you can check your own using ip -br a; on VPS systems, this is often eth0 or ens3), except for those coming from the address 203.0.113.10. Outgoing connections from the containers and response packets will still be allowed through.
Ubuntu and Debian (ufw): the rule should be placed at the end of the /etc/ufw/after.rules file, so that ufw loads it on every start-up and reload:
# Docker: new connections to the containers from outside only from the given address
*filter
:DOCKER-USER - [0:0]
-A DOCKER-USER -i enp0s1 -p tcp -m conntrack --ctstate NEW --ctorigdstport 443 -j RETURN
-A DOCKER-USER -i enp0s1 -m conntrack --ctstate NEW ! -s 203.0.113.10 -j DROP
COMMIT
sudo ufw reload
sudo iptables -S DOCKER-USER
The line --ctorigdstport 443 is an exception: port 443 (for example, a reverse proxy container) can be accessed from anywhere, while the other published ports can only be accessed from the specified address. If you do not have such a port, omit the line. In testing (Ubuntu 26.04, Debian 13), the rule remained in place even after running ufw reload, restarting Docker and restarting the machine; the port specified in the exception remained accessible, while the other exposed ports became inaccessible from the outside.
AlmaLinux (firewalld): using firewalld’s direct rules:
sudo firewall-cmd --permanent --direct --add-chain ipv4 filter DOCKER-USER
sudo firewall-cmd --permanent --direct --add-rule ipv4 filter DOCKER-USER 0 -i eth0 -m conntrack --ctstate NEW ! -s 203.0.113.10 -j DROP
sudo firewall-cmd --reload
sudo iptables -S DOCKER-USER
In the test (AlmaLinux 10.2, firewalld 2.4.3), the rule remained in effect even after running firewall-cmd --reload and restarting the machine. After running --reload, Docker spent a few seconds rebuilding its own rules; during this time, the containers were unavailable. The firewalld documentation states that the direct interface is deprecated, so Solution 1 is the preferred option here as well.
These rules apply only to IPv4, and the test was also carried out using IPv4 only. If the server also supports IPv6, the 127.0.0.1 connection covers both, so that is the simpler option there too. The article How do I set up a firewall on my VPS? explains the firewall’s default settings.
Update
Docker packages are updated alongside the rest of the system’s packages (using sudo apt upgrade or sudo dnf upgrade; see: System updates using the dnf and apt commands). The docker service restarts during an update, and so do the containers: containers started without the restart rule (--restart unless-stopped or, in Compose, restart: unless-stopped) will remain stopped. The images of running containers are not updated automatically; to do this, you must download the new image and recreate the container.
Uninstalling Docker
Ubuntu and Debian:
sudo apt purge docker-ce docker-ce-cli containerd.io docker-buildx-plugin docker-compose-plugin docker-ce-rootless-extras
sudo rm /etc/apt/sources.list.d/docker.sources /etc/apt/keyrings/docker.asc
AlmaLinux:
sudo dnf remove docker-ce docker-ce-cli containerd.io docker-buildx-plugin docker-compose-plugin docker-ce-rootless-extras
sudo rm /etc/yum.repos.d/docker-ce.repo
If you installed it using the installer script, the docker-model-plugin package will also be added to the list; on Debian and Ubuntu, the script writes the repository to the file /etc/apt/sources.list.d/docker.list.
Removing packages does not delete images, containers or volumes. If you do not need these either (they will be permanently deleted, along with the databases contained within the volumes):
sudo rm -rf /var/lib/docker /var/lib/containerd
After the test removal, a few items remained; you can delete these manually: the docker group (sudo groupdel docker), the /etc/docker/daemon.json file, and, on AlmaLinux, the docker zone and docker-forwarding policy in firewalld:
sudo firewall-cmd --permanent --delete-policy=docker-forwarding
sudo firewall-cmd --permanent --delete-zone=docker
sudo firewall-cmd --reload
If you have added a DOCKER-USER rule for ufw or firewalld, please remove it as well.